Pig Roast

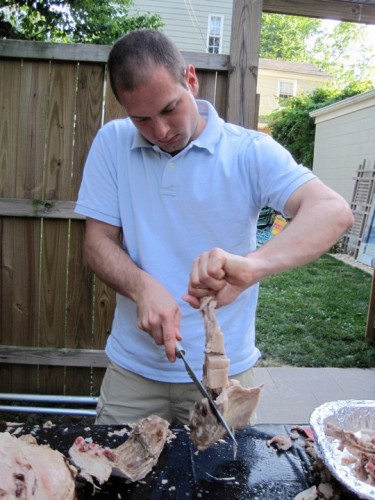
Got to play sous chef at a pig roast on Saturday put on by Jonathan and Dan. Also had my first ride on GRTC bus in Richmond. Even owned the table at beer pong for a while.

Got to play sous chef at a pig roast on Saturday put on by Jonathan and Dan. Also had my first ride on GRTC bus in Richmond. Even owned the table at beer pong for a while.

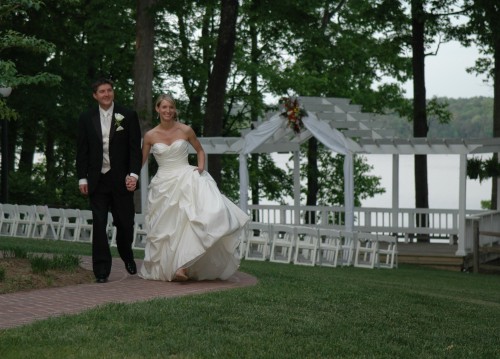
This weekend many friends were in town for the wedding between Becky Merrill and Joe Bocian. They had a beautiful ceremony and reception at Celebrations on the banks of Swift Creek Reservoir. Here is a collection of photos taken by the Sloan, Espinoza, Merrill, Britton and Deutsch families.
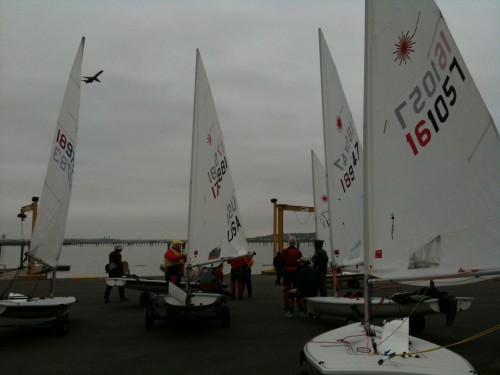
Today was the first day of Laser racing in the Sunshine Open and US Sailing Singlehanded Championship Area C Elimination held at Severn Sailing Association in Annapolis, MD. We started the day in little wind with a long sail out to the race course. I took us over 2 hours to sail a little more than an hour to the race area. Eventually the wind filled in to just over 5 and we got a race off.
The course was supposed to be an Olympic and it was set a little less than a mile to the windward mark. After the first 3 legs the RC smartly shortened to course otherwise nobody would have finished within the time limit. I did my best to get clear air and pick the shifts, but had a tough time making the boat go fast. I started, sailed and finished mid-fleet.
After the first race, the RC postponed again. The wind filled in to a steady 10+ by about 3pm and they started another race. I had a good start and had clean air, but by the time we were at the top mark, I was on the wrong side of a few shifts and found myself in the middle of the 30+ boat fleet. It was nice sailing in some wind. I held my position and finished 16th.
We had a great dinner and camaraderie between the sailors after racing. All and all it was a good day. Tomorrow we’re hoping the rain stays away so we can get in 4 races.
The second day of the regatta was supposed to start an hour earlier, but the wind wasn’t really cooperating. The RC towed us all out to the race course, but we ended up sitting at anchor for over 2 hours before the wind finally settled in and we could get a race off.
The wind was light and fortunately I had a bad start near the boat. I say fortunately because it forced me to go out to the right side of the course which ended up being brilliant. I was 5th around the first mark, 4th around the second mark and 4 around the final mark. I wasn’t able to hold on to my position on the final beat and surrendered a few boats, but a top 10 finish (8), was nice to have.
In the second race the wind picked up to 10-12. Again, I had a bad start and this time ended up more on the wrong side of the course. I hung right behind the lead pack of about 15 boats and ended up chasing them all around the course with out ever breaking into the pack. I ended up 17th in that one.
All in all it was a good regatta. 13th overall in the 34 boat fleet. I still have a lot of work to do to hike harder and get my boat speed up. The first big regatta of the season is down. Looking forward to some small local regattas in the next few weeks before the ACC in June.

This weekend was Opening Weekend at Fishing Bay Yacht Club. We had two beautiful days of racing with winds between 10-20 knots. Between sailing the past 3 weekends and the unseasonably warm weather we’ve had – it hardly seems like opening weekend for me. It’s not May yet, but it certainly feels like it.
This weekend and the last 2 weekends I have sailed aboard Wavelength, a C&C 37 with ~9 other crew. It’s been fun sailing the same boat for a while and really learning some of the finer points of sail trim and boat handling. Let the sailing season begin!
Today was the first day of the Capital City Regatta at Potomac River Sailing Association near the Regan International Airport in Washington DC. Fortunately we got clear weather despite the temperatures still being pretty cold. 24 boats came out to race.
We headed out to the race course for a noon start with light and fickle winds. We ended up with puffy 4-6 mph winds all day with occasional gusts to 12. It was a good day on the water and I had some good moments and some not so good moments. I went from contender to pretender almost every other leg. Today was all about finding wind and sailing in the puffs.
All in all it was an up and down day for me. I had finishes of 2 to 22 and everything in between. I’m in the top half of the fleet and with a drop and decent finishes tomorrow I should be able to get near the top 5.

Day 2 at the Capital City Regatta did not start out looking very promising. Upon arriving to rig the boats there wasn’t a breath of wind. The RC smartly postponed for an hour and we all stood around in full gear shooting the breeze. The minute someone opened a beer and another began to de-rig the wind started coming in so the postponement was lifted and we headed out.
Georgetown was also running a regatta and we swapped sailing areas today putting us in the cove. The flotsam in the cove was to be avoided, but it was not nearly as bad as it was yesterday . The winds were light and shifty, and began to build as the front got closer.
Racing today went well. I did fine moving the boat whenever I wasn’t guessing which way the wind was coming from. Today was a much better day boat-handling-wise and I think I’ve gotten back into the groove and gotten the cob webs out.
We ended up getting in 4 more races before the time limit. Aside from one race where I took out a mark to avoid fouling someone I sailed fairly consistently in the upper half of the fleet. That put me into 6th overall which was a good result for my first time out this year. Scott and everyone as PRSA did a great job running the regatta and the BBQ each day was great. I also want to thank Len and Barb for the place to stay Saturday night.
This has been a beautiful weekend and it would have been a shame not to get out on the water. The Hampton Roads Laser Fleet was having a frostbite at the ODU Sailing complex and I decided to get the boat out and join them. This being my first time out since October it was a chance to get the cobwebs out as well as a shake down for regattas in the next couple weekends.
We ended up having the best fleet they’ve had out all year with 9 boats. The weather was gorgeous with 12-17 knots in the Elisabeth River. We set up short 2-lap courses that took about 15 minutes to complete. The short courses really put a premium on picking the right side of the course and on boat handling. There’s no time for that shift to come back in an oscillating breeze.
After the first couple races everyone really got into their grooves and we had some nice tight racing. Overall I kept in the upper-middle part of the pack, usually just a couple boat-lengths out of the lead. I had a 4th over all. All in all it was a good day on the water, and I’m looking forward to getting the season started next weekend at the Capital City Regatta in Washington DC.

We started out bright and early this morning on our trip to Tampa for the Fireball and Friends midwinter’s. I am sailing a Front Runner along with 7 other boats based in Richmond from Fishing Bay Yacht Club. 5 of us left Richmond at 5:30am in a caravan heading south.
The trip started out fine, but about 150 miles into the trip the tire went on the trailer I was driving. Unfortunately the spare was a dud too, but thankfully Mark came to the rescue and loaned me his spare. The rest of the trip was relatively uneventful and we pulled into Davis Island Yacht Club around 7pm.
Most of the other boats in our group arrived around the same time and after unloading the boats we stopped for some pizza before heading out to find our house for the weekend.
Tomorrow, after getting some new tires we’ll set up the boats and get ready to race in the afternoon. The weather is calling for scattered storms and 12-15+.
The plan for today had been to get the boat ready, do a practice sail and then a Portsmouth handicap race in the evening, but rain, a tornado warning, flash flood warning and lake wind advisory foiled those plans. Instead I got the tires fixed and joined the group for lunch at Ybor Brewing Company. In the afternoon we relaxed around the house and then Rick and Jen cooked up a great steak, chicken and sausage dinner with salad and baked potatoes. The rest of the evening was spent playing cards and recounting old times sailing at FBYC.
We’ll have to get an early start to the day tomorrow to get the boat setup and ready to sail. We’ve seen a variety of forecasts, but presently we’re expecting lighter winds with a possibility of some rain.

Today was supposed to be the first day of racing at the Front Runner Midwinters at Davis Island Yacht Club in Tampa Florida, but the weather definitely put a damper on it. We arrived at the club early to get the boats set up and the race committee had already postponed our noon first start. We took refuge in the club house and waited for a break in the weather that came around noon. The weather gave us a window just long enough to get the boats set up before another front came through.
Throughout the day we either had wet and windy or cloudy with no wind. Late in the afternoon a couple of Fireballs did get out on the water. At times they were just sitting there in the drizzling rain. That hardly looked like fun sailing. Our group stayed inside and played cards for most of the afternoon. Late in the afternoon the RC postponed the first race until tomorrow. We’ll have to be up nice and early for a 9:30 first start on Saturday. The weather for the rest of the weekend is supposed to be beautiful.

We arrived at Davis Island Yacht Club on Saturday morning hoping to get in our first day of sailing. The wind was up around 15-18 knots when we arrived and white caps were beginning to appear. By the time we got the boats launched the wind was sustained 18-20.
This was my first time helming a Front Runner and we headed out to the course with the rest of the fleet. A few boats who had gone out ahead of us, passed us going the other way, and I just figured they were doing some upwind practice. Once we made it to the starting area we quickly realized we weren’t going to be able to compete in this wind, and having only been in the boat once before, it was probably going to be best for us not to remain out long. So we headed back for the dock.
Turns out we had good company. The boats I thought were practicing were already rafted up and within 2 minutes we were joined by another boat making 4 out of the 10 boats already at the dock. After we tied up, we went up to the deck at the yacht club where we had a great view of the race course. We watched the carnage as boats were towed back in. The crash boat at DIYC did a great job recovering boats and getting back to the club.
One boat in our group ended up nearly sinking and it ultimately took us 2 hours to drain. 3 boats ended up getting in 3 races. The rest of us hung around the club in the sun and put the boats away for the night.
Tomorrow the forecast is for a little less wind. If it’s the right strength then we’ll make a go of it, otherwise if it ends up being too much, we’ll probably leave a boat behind and triple up on a couple boats.
Our group was a little slow getting going this morning. Many of us were up late at the Ybor St. Patrick’s Day parade and the time change didn’t help either. The conditions were finally what we had been wanting all week. 10-15 knots out of the west.
Since three boats sailed in 3 races yesterday and the rest of use had DNSs it wasn’t much of a boat race for the rest of us. Most of us just considered today to be the real race and wanted to finish as well as we could in whatever races we sailed today despite not being able to get on the podium.
We didn’t have much time to tune up before the first race and only got through each maneuver (tack, jibe, hoist, douse) once. The goal at the start was to be conservative and just stay with fleet as it went up the course. My conservative start worked out; in fact we ended up with the best start in the fleet hitting the line right at the gun with clear air and full speed.
I had been told that a Front Runner is ‘just a big Laser.’ Not having much familiarity with larger boats, I didn’t have anything else to go by, so I just sailed it like a big Laser. I focused on some of the basics in a laser like sailing the boat flat, neutralizing the helm and keeping the main sail trimmed as well as I could.
The west wind in the area just south of Davis Island is very similar to the wind on many of the rivers along the Chesapeake. The chop is small and the wind is puffy in phases. It turned out that our boat speed up the first beat was as good as any other boat and by picking the shifts right we found ourselves first around the windward mark with a 2 boat length lead over Mark H’s boat that won all 3 races yesterday.
Downwind I did a terrible job sailing the right angles with the a symmetrical spinnaker, but like a laser, I was able to keep it moving through the waves and even managed to pump the main on some puffs and surf some waves. We held the lead into the leeward mark as we made the turn for the second and final lap. On both legs we continued to match the boat speed of Mark H’s boat and managed a 6 boat length lead at the finish.
It was great feeling to win the first race I ever sailed in a new boat; particularly in such a deep fleet with so many boats. My crew Sue and I were pretty psyched. We took that enthusiasm into the second race and sailed very well to a 2nd place finish. At that point the wind started picking up and a little water had leaked into the boat changing the handling characteristics and it took me a race to relearn how the boat handles.
In the end our finishes were around 1, 2, 7, 5 putting us into 5th place overall. That definitely hits the goal of sailing competitively and sticking with the fleet. And the sailing conditions were great which added a nice ending to a week of difficult and un-sailable conditions.
Even though the sailing wasn’t as good as it could have been, the trip to Florida has been an incredibly fun time. I want to thank the Front Runner crowd – Matt B, Jen, Mark, Melissa, Kevin, Matt L and everyone else for bringing me along as well as Mike K for loaning me the boat. You’ve all been telling me for years how great of a trip this is and now I’m a believer. Thanks for the great time!
Monday we began the journey back to Richmond from Tampa. We made good time and I happy to report the trip was entirely uneventful. Later this week I’ll post the photos and a video from the trip.
All this snow we’ve gotten this winter made for some great skiing conditions on the last weekend in February.
The 2010 Dodgeball season came to an end. Our team might have lost more games than we won, but we had a good time. Here are photos from our last game and below is a video.